How To Install Lori Single Cylinder Deadbolt | Mr. Locksmith White Rock: Installing a Lori deadbolt. The Lori Deadbolt can be a little bit confusing, because most deadbolts have the screws on the inside, so it’s pretty easy to figure out how to remove it, its double cylinders are a little different, so most of our Kwikset, Weiser, and Schlage deadbolts is pretty simple. You have a couple of screws, you take it out the traditional way. The Lori Deadbolts have a set screw hidden along the side of the bolt. You will need a 5/16-inch long-shaft Allen wrench to install or remove the set screws.
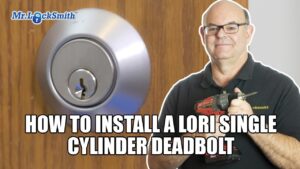
How To Install a Lori Single Cylinder Deadbolt
Tools to Install Lori Deadbolt
- Phillips screwdriver
- 5/16-inch long-shaft Allen wrench
- Open the Door
- Detach the slide bolt faceplate from the door edge by removing the two flathead screws using a Phillips screwdriver.
- Remove the thumb latch assembly from the interior side of the door, if applicable, by removing the two screw bolts on either side of the latch handle, then pulling the assembly horizontally from the door.
- Slip the long shaft of a 5/16-inch Allen wrench into the space on either side of the slide bolt to engage in the cylinder set screws and turn the set screw counterclockwise two to three full turns to loosen. Repeat for the set screw on the other side of the slide bolt.
- Remove the deadbolt cylinders by turning the cylinders counterclockwise until the cylinder is free of the mortise housing. You can insert the deadbolt’s key into the cylinder for leverage in turning the cylinder. Repeat for the opposite side cylinder in double-keyed models.
- Pull the slide bolt assembly from the door edge, then remove the cylinder housing from the door hole.
Lori Single Cylinder Deadbolt
A couple of screws. You can see the screws, you can see how to take it apart. And everything apart. So that’s your traditional single cylinder deadbolt. Now I’ll show you the Lori. They’re made by a ilco, UniCan, kaba, whatever you want to call them this week. It’s not my favorite deadbolt. In the year, you know, 35 years ago, it was a good deadbolt and I’ll show you why, because we could make almost any cylinder fit this. So, and that’s why they’re confusing when you see this on the door. Sometimes they’ll say Lori, other times they’ll say, could be Schlage, could be kaba, could be medical. It could be almost any type of lock. And you’ll see why it’s confusing for Locksmiths and also beginner locksmiths, or just the home, do it yourself or try to take this Lori lock off the door. So this is the ilko Lori, pretty simple. It’s instructions. Now, you’ll see it’s already slightly different than our normal deadbolts. And what the important pieces on this is, it’s the Allen key. You needed a long reach Allen wrench or Allen key. What do you want to call it? The Allen wrench or Allen key is five 64 of an inch. So this is what you need. And this is what’s a real pain in the butt. And it has to be a longer one, the normal. So sometimes your little kits don’t have the reach for it. So that’s the most important thing to the installation of this lock. And we’ll just show you what we got here. Now, this is a single cylinder and it’s pretty basic stuff. What you have here is the housing and it’s pretty easy. It says right on there top, is there an inside and outside? Here’s the confusing part. It has the little set screws and you can’t really see it when you’re trying to take it off. But when we’re putting it in, it’s a little bit different. So to install it, we have the cylinder housing, make sure your set screws are flush. That makes it easier to do the install. Top there, just place it in there, take our dead bolt, basically going to feed it in there. This is the single cylinder deadbolt. So this is what comes in the kit. Now this is what gets a little confusing. These machine screws are for holding the thumb turn on, these ones in the bag here, are for holding the housing to the bolts. So we’ll take these out right now. So there we have, now the bolt is into the housing. So the next step is, we have to change, this is a mortis cam and they have to use the Adams right cam. Take it off, put it in, and make sure, you know, you get the right side down. This will set flush, and that’s another common mistake. People put these in. So again, just tight don’t over crank them. And they have to be flush. So we’ve got the Adam’s right cam on the boarder cylinder. Everything’s good, we got the right key. Okay, everything’s perfect. So the spacer goes on first, then our little springy cover. And what we have to do now, take the outside housing, and what we’re going to do, is we’re going to install it. It’s going to screw in similar to an Adam’s rights storefront. But we’re going to screw the mortar cylinder in here. And again, don’t cross thread it. It’s pretty easy to cross thread. And I take the key out a little bit and gently get it snug. We have the mortar cylinder in the outside. Now I’m going to install the thumb turn on the inside. Other screws. Again, don’t force anything. You’ll cross thread the heck out of everything. So again, just do it snug, double check it, and check this. Now what we have to do to make sure, make sure that’s vertical. Now this is the confusing part. You can take your Allen wrench 564s. It has to be long. Now this is the difficult part for most people. You have to get it right in there, and just sort of wiggle it a little bit, and then you get in the set screw. Right to tighten, and again, snug not crazy, so we know we’re in, pull it out. Try that. Yeah, we obviously didn’t, I think we’re, I got to go in a little bit tighter. Cause see how it’s binding a little bit there, right there. We’re either binding on the, I think we’re binding on the set screws. You’d have to back it off or put it in. So let’s just snug. Now it’s a lot better. So just check by putting your, lock it, take the key out, unlock it, take the key out, one more check on the inside. Now we don’t have to do the set screw there because it’s a single cylinder, and these are held into the housing, these two screws. So we don’t have to set the screw there. The cover plate. Make sure it works. Don’t over-tighten these, if you over-tighten it, you’re going to find the bolt won’t open and close properly. There we go. Pretty simple. The advantage of this lock in the old days, again, I am not a fan of it right now, we run across a lot of them, is I can put any mortar cylinder with the Adam’s right cam in here. So I can put in anything. I can put it in a high security, any mortar cylinder lock, or any brand lock, any brand name will screw into that, and you can key it up to anything. So it’s a very versatile. In the old days it was versatile because we didn’t have too much choice. And now we have so many choices right now. As you know my favorite is the, take the Schlage, the B 660s or the 560s, or even the the end series, the new ones, the 60 ends. I can put the kick cylinder, we call them kicks owners. So it’s a cylinder we can put in. But we’re talking about this lock today. So this is the Lori Kaba. In its day it was versatile, but we run across a lot of these and some customers still have them, and some commercial buildings have boxes of these things. So we’re still installing them. They’re okay, I’m not a fan of them. I find them, if they’re exposed to weather, that little set screw rust up and the inside rust up. Again, not my favorite lock. It’s not that cheap either, but we run across them. So this is the Ilco, Lori, Kaba style deadbolt. It’s mostly called the Lori single cylinder deadbolt. Hope you enjoyed the video. Good luck when you run across these. Okay, have a good day. I hope you enjoyed watching this video. Subscribe to my channel, also visit my website and you can see what online Locksmith training I have for beginners, intermediate and advanced, as well as my covert methods of entry, and my non-destructive methods of entry.
Lori Deadbolt
Mr. Locksmith White Rock: (604) 210-9875
Mr. Locksmith Automotive : (604) 259-7617
About Terry Whin-Yates North Vancouver
Terry Whin-Yates is the president and SEO of Mr. Locksmith and it. Terry’s father and grandfather taught him how to pick locks. Terry has 35+ year experience as a locksmith and a BA(Hons) degree in Criminology from Simon Fraser University. Today he lives in Vancouver and his children work in the business. Mr. Locksmith has several locksmith franchisees, all of whom are like extensions of the family business.


 Mr. Locksmith White is BC Government Licensed Locksmith in White Rock are fully licenced, bonded and insured.